Without the window
Everything the app does can be done without it. One of these is the answer if the app will not run on your system, if you are working over SSH, or if you would rather see the commands.
They all produce the same EFI folder - the window runs the second one of them and draws its output.
The same builder in a terminal
HackintoshEFIBuilder-console-win-x64.zip in Releases is
EFIBuilderEngine.exe on its own, for Windows. It carries everything inside it,
same as the app, and asks the same questions in the same order:
EFIBuilderEngine.exe                        the builder
EFIBuilderEngine.exe --check                just the hardware reading, then exit
EFIBuilderEngine.exe --report machine.json  write this machine's report
EFIBuilderEngine.exe --machine machine.json build for the machine in that file
Smart App Control blocks this one for exactly the same reason it blocks the app; see When your system blocks it.
From a clone
Needs Python 3.11 and nothing else - no packages to install, no network. Works on Windows, Linux and macOS.
python3 tools/setup.py                        the builder
python3 tools/setup.py --check                just the hardware reading
python3 tools/setup.py --machine machine.json build for another machine
python3 tools/detect.py --report machine.json write this machine's report
The USB stick and the recovery download are their own tools, and the panes in the app are these:
python3 tools/recovery.py --list
python3 tools/recovery.py --macos 12.7.6 --out /Volumes/USB

python3 tools/stick.py --list
python3 tools/stick.py --prepare disk4        erases it, and says so twice
python3 tools/stick.py --place /Volumes/USB --efi build/EFI --recovery .
--prepare only ever lists removable, external disks, never the one the
computer booted from, and asks for the disk by its own name before it starts.
Formatting the stick yourself
A stick for the recovery route is a plain one: GUID Partition Map with a single MS-DOS (FAT) partition. On macOS that is Disk Utility with View → Show All Devices, selecting the drive itself rather than the volume under it, or:
diskutil list                                        # find the disk number
diskutil eraseDisk MS-DOS USB GPT /dev/diskN         # N is that number
Then put EFI/ and com.apple.recovery.boot/ at the root of it, side by side,
as in Make the USB stick.
No script at all
EFI-base.zip and configs.zip in the same release are the manual route.
- Extract
EFI-base.zip. You get anEFIfolder - the same one for every machine, because OpenCore loads only what the config names. That is also why it is about 7 MB rather than a gigabyte. - Open
configs.zipand find the entry matching your hardware. Example: - my CPU is
i5-7200U. It is aKaby Lake Mobile (Laptop)cpu, and the laptop is an HP. - so I take
Laptop/HP/009 - Laptop - Kaby Lake.plist. - if there is no entry for your brand, take the plain one -
Laptop/009 - Laptop - Kaby Lake.plist. - Copy that file into
EFI/OC/and rename it toconfig.plist. - Copy the
EFIfolder to the EFI partition of the stick.
Nothing detects anything on this route, so nothing is added for your network card - see Adding a kext by hand below.
Generating a config yourself
To pick a different OpenCore version, or because your combination is not in the list, the repository generates these folders from a small set of profiles:
python3 tools/build.py --catalogue                 # list every published config
python3 tools/build.py --name "Laptop/HP/009 - Laptop - Kaby Lake"
python3 tools/build.py --platform laptop --cpu kaby-lake --oem hp
It needs nothing but Python 3.11 and a clone. See tools/README.md.
Adding a kext by hand
The builder does this for you, and it knows 531 device ids and which kext drives each. This is the route if you are working from the release zips, or if you have hardware it does not cover.
Shut down, boot back into Windows, and get the kext your card needs:
| Card | Kext |
|---|---|
| Intel Wi-Fi | itlwm |
| Intel Ethernet | IntelMausi |
| Realtek RTL8111 Ethernet | RTL8111_driver_for_OS_X |
| Realtek RTL810x Ethernet | RealtekRTL8100 |
| Realtek RTL8125 Ethernet | LucyRTL8125Ethernet |
| Broadcom Wi-Fi | AirportBrcmFixup |
| Atheros Wi-Fi | Dortania's list |
- Put the
.kextinEFI/OC/Kexts. -
Open
config.plistin Notepad or Notepad++ and findKernelwith Ctrl+F.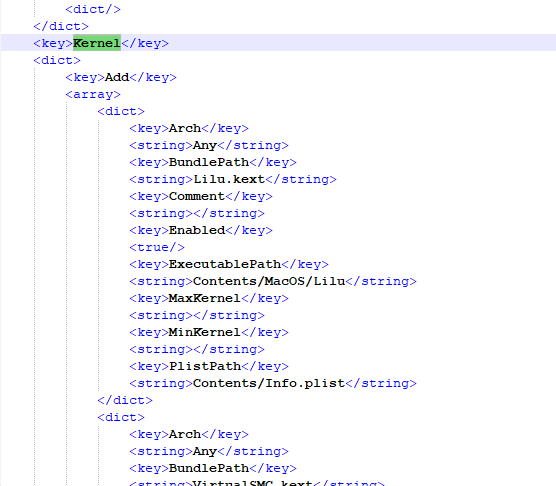
-
Go to the bottom of the
Addsection and add an entry for the kext, matching the shape of the entries already there.
Finding your hardware yourself
The builder reads all of this for you, so this is only needed if you want to check a machine before starting - or before buying one.
Download and install AIDA64 Extreme, open it and double-click Summary. That gives the CPU, motherboard, GPU and audio adapter.
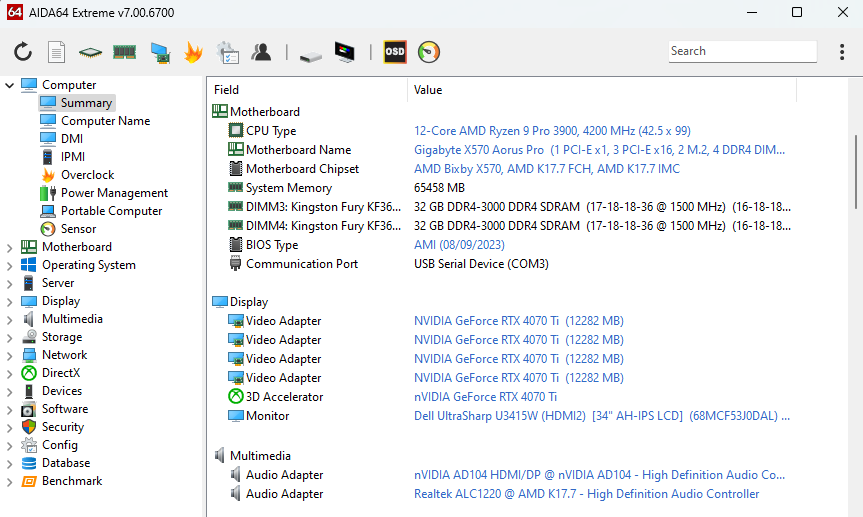
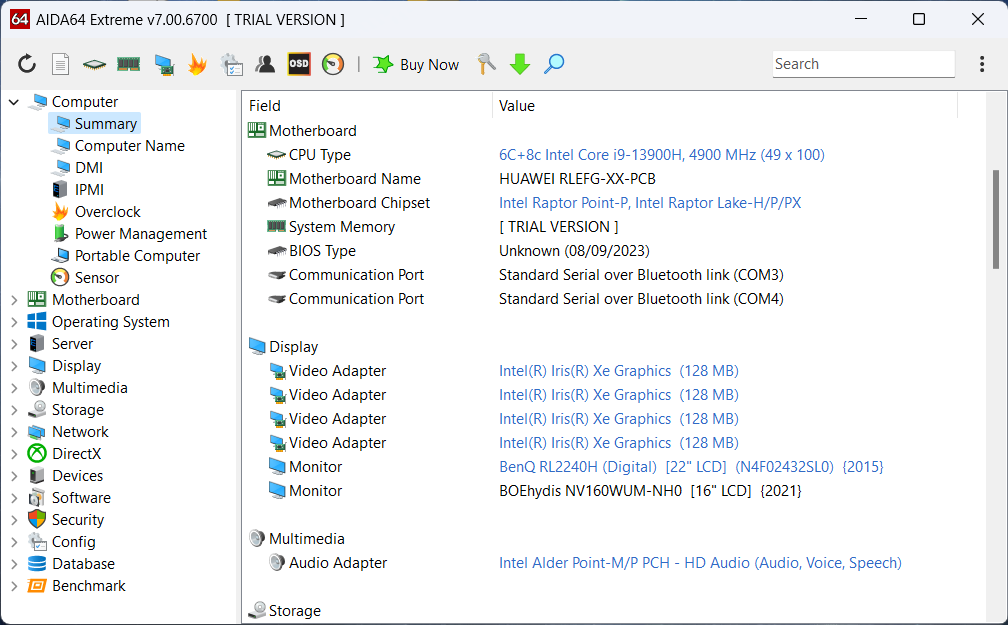
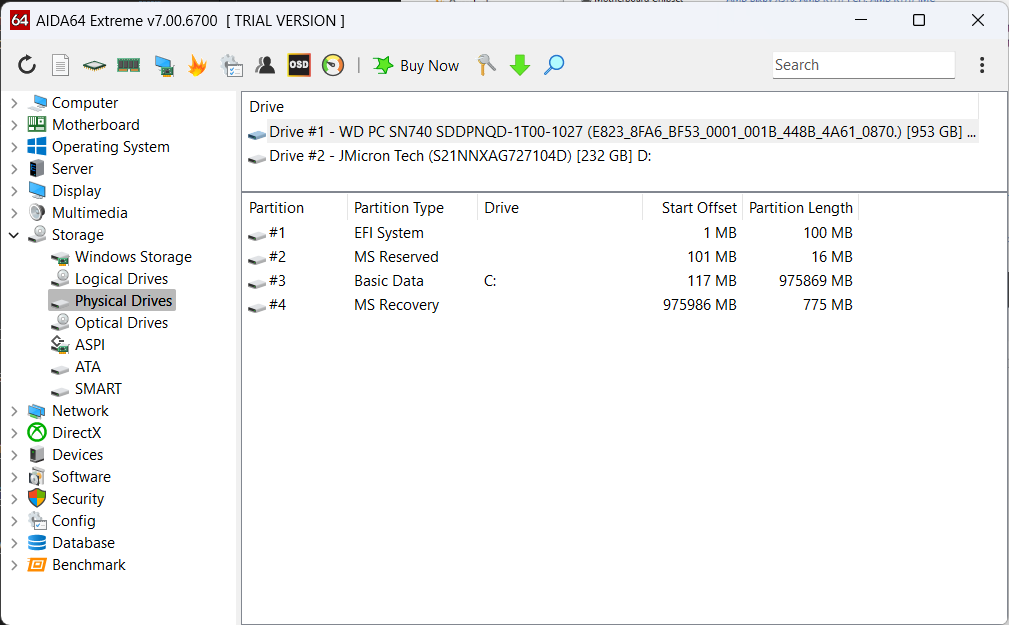
The disk model, the network cards and the touchpad are the rest of what matters.
-
Storage → Physical Drives
-
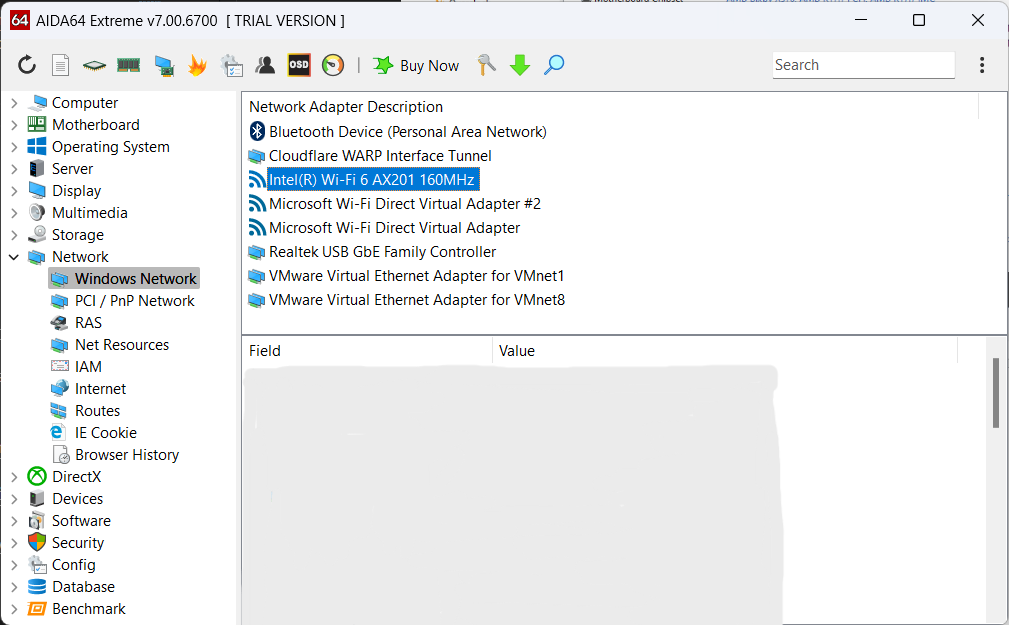
Network → Windows Network
-
Devices → PCI Devices for the touchpad. It is usually PS/2 or I²C.
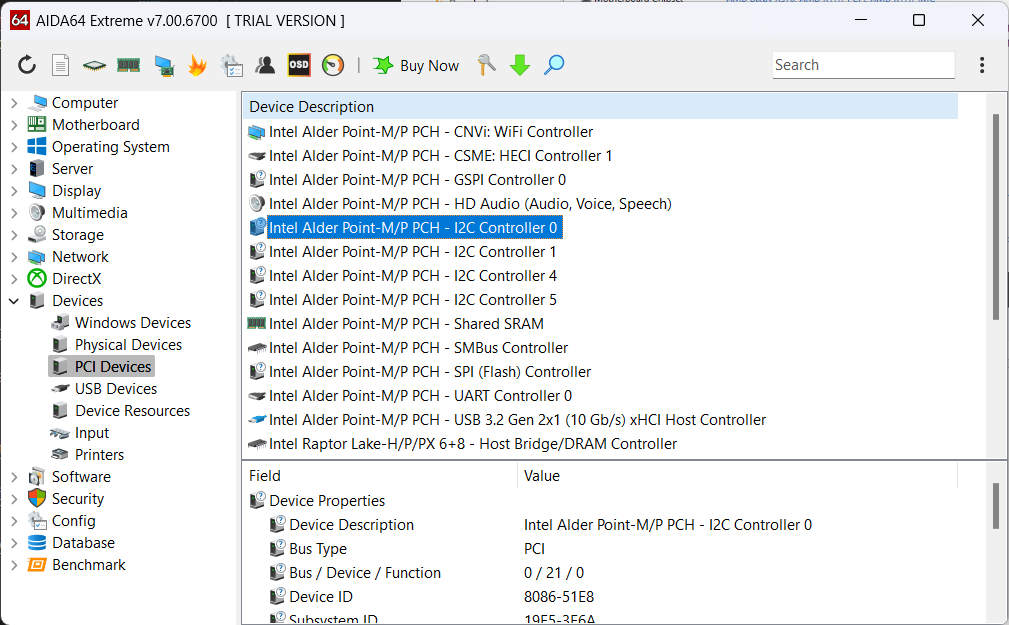
Those screenshots come from the machine this guide was written on, which reads:
| Model | Lenovo ThinkPad E570 |
| CPU | Intel Core i5-7200U |
| iGPU | Intel HD Graphics 620 |
| Audio | Conexant CX20753/4 |
| Disk | KBG40ZNV256G KIOXIA NVMe 256GB, Samsung SSD 860 EVO 250GB |
| Network | Dell Wireless 1820A Wi-Fi + Bluetooth, Realtek RTL8111/8168/8411 Ethernet |
| Touchpad | SynPS/2 Synaptics TouchPad |